Wazuh Agent with Cloudflare Tunnels
I wanted to make it so my Wazuh SIEM was accessible publicly without needing to port forward to the whole internet. To do that, I decided to use two Cloudflare Tunnels to allow for remote agent registration and syncing.
Cloudflare Tunnel Server Setup #
On the server running Wazuh, you’ll need to first install the cloudflared binary. You’ll see a similar command to the following, which is accessible after creating a new tunnel in Networks > Tunnels in the Zero Trust dashboard.
curl -L --output cloudflared.deb https://github.com/cloudflare/cloudflared/releases/latest/download/cloudflared-linux-amd64.deb &&
sudo dpkg -i cloudflared.deb &&
sudo cloudflared service install <SECRET>
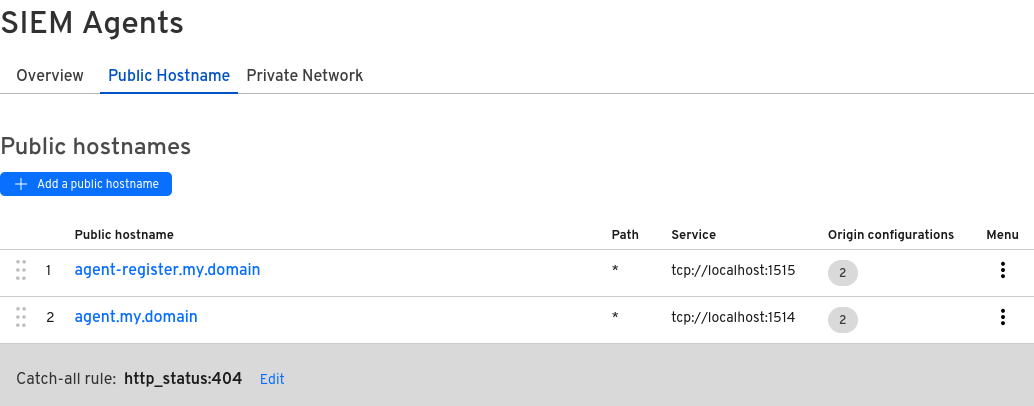
This will make it so that you can remotely configure the cloudflared service remotely from the Zero Trust dashboard. Configure your dashboard to have two public hostnames, one for the agent registration, and the other for the agent syncing. This is the bare minimum you need to you connect the agent. The tunnels will need to be sent over TCP.
Tip
You should consider using an enrollment password, so arbitrary users cannot authenticate into your SIEM.
Another recommendation is to lock down the tunnels with Cloudflare Access. See Access Policies. For example, I’ve created two Bypass policies, so that my tunnels are only accessible from the USA. All other locations will not allow a connection.
Cloudflare Tunnel Client Setup #
cloudflared requires TCP connections to connect as a client, so we need to create two services that connect to our cloudflare tunnels. One is for the Wazuh agent registration, and the other for actual Wazuh agent syncing.
The registration tunnel is only required initially. You can turn that off after agent registration is completed.
Note
The agent will only ever report an IP address of localhost to the wazuh management console.
Linux Installation #
Tunnel Services #
Install cloudflared first.
CLOUDFLARED_PATH=$(which cloudflared)

AGENT_REGISTRATION_HOSTNAME="agent-register.my.domain"
AGENT_HOSTNAME="agent.my.domain"

cat << EOF | sudo tee /etc/systemd/system/wazuh-agent-registration-tunnel.service
[Unit]
Before=wazuh-agent.service
Requires=wazuh-agent.service
Description=Wazuh Agent Registration Cloudflared Tunnel

[Service]
ExecStart=$CLOUDFLARED_PATH access tcp --hostname $AGENT_REGISTRATION_HOSTNAME --url tcp://localhost:1515

[Install]
WantedBy=multi-user.target
EOF

systemctl start wazuh-agent-registration-tunnel.service

cat << EOF | sudo tee /etc/systemd/system/wazuh-agent-tunnel.service
[Unit]
Before=wazuh-agent.service
Requires=wazuh-agent.service
Description=Wazuh Agent Cloudflared Tunnel

[Service]
ExecStart=$CLOUDFLARED_PATH access tcp --hostname $AGENT_HOSTNAME --url tcp://localhost:1514

[Install]
WantedBy=multi-user.target
EOF

systemctl start wazuh-agent-tunnel.service
Agent Service #
Follow the initial documentation for agent installation. You shouldn’t need to change the wazuh-agent.service systemd file, as the tunnels have a strong dependency via Before and Requires.
When deploying, run a command similar to this:
# Set the WAZUH_REGISTRATION_PASSWORD to your required agent password
WAZUH_MANAGER="localhost" WAZUH_REGISTRATION_SERVER="localhost" WAZUH_REGISTRATION_PORT="1515" WAZUH_REGISTRATION_PASSWORD="" apt-get install wazuh-agent
Windows Installation #
Tunnel Services #
winget install --id Cloudflare.cloudflared # Install cloudflared
$cloudflarePath = $(Get-Command cloudflared.exe).Source # For the following service configs BinaryPathName

$agentRegistrationHostname = "agent-register.my.domain"
$agentHostname = "agent.my.domain"

$params = @{
  Name = "WazuhAgentRegistrationCloudflaredTunnel"
  BinaryPathName = "$cloudflarePath access tcp --hostname $agentRegistrationHostname --url tcp://localhost:1515"
  DisplayName = "Wazuh Agent Registration Cloudflared Tunnel"
  StartupType = "Automatic "
  Description = "Tunnel allowing for wazuh agent registration"
}
New-Service @params
Start-Service $params.name

$params = @{
  Name = "WazuhAgentCloudflaredTunnel"
  BinaryPathName = "$cloudflarePath access tcp --hostname $agentHostname --url tcp://localhost:1514"
  DisplayName = "Wazuh Agent Cloudflared Tunnel"
  StartupType = "Automatic "
  Description = "Tunnel allowing for wazuh agent syncing"
}
New-Service @params
Start-Service $params.name

# Now manually change both services to have them restart on failure
Agent Service #
# Grab exe from https://documentation.wazuh.com/4.7/installation-guide/wazuh-agent/wazuh-agent-package-windows.html
# Hit download Windows installer link

.\wazuh-agent-4.7.5-1.msi  WAZUH_MANAGER="localhost" WAZUH_REGISTRATION_SERVER="localhost" WAZUH_REGISTRATION_PORT="1515" WAZUH_REGISTRATION_PASSWORD="" # The password you should have set for enrollment

# Now manually change to restart on failure
Conclusion #
By using the previous setup, your Wazuh agents will automatically connect to the Wazuh SIEM via Cloudflare Tunnels. The tunnels will obfuscate your public IP and allow for access control if you decide to use any Access Policies. Your agents should then be able to send data to your SIEM from anywhere in the world.